Download the program and launch it.
Initiate the program and get the main interface below: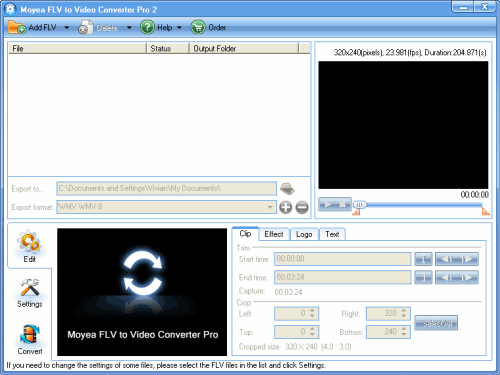
Step1. Input the File, Locate the output files and specify output format.
Click the “Add FLV” button on the tool bar to import your FLV file and hit the file name for a preview. You can click the folder icon in the middle of the interface to specify your target file destination. Then you can choose the output format from the drop-down menu of “Export format”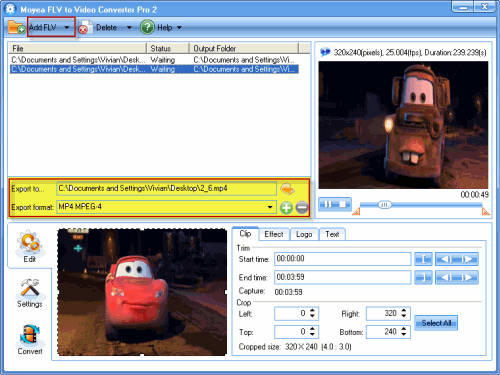
Step2. Edit FLV files
You can edit FLV files. In “Edit” tag, there are four parts: Clip, Effect, Logo, and Text.
Trim the video length and get rid of unwanted parts and cut off the black edges around the video by cropping function.
Add logo
Click the icon that the arrow points to add image to the video. You can set the transparency by hitting wrench icon, specify the logo position in “Origin”, and adjust the logo size with setting the values of “Width” and “Height”.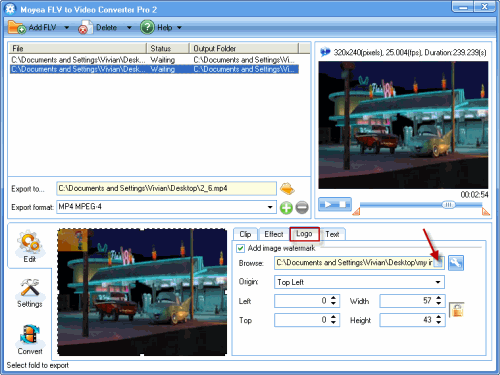
Add text
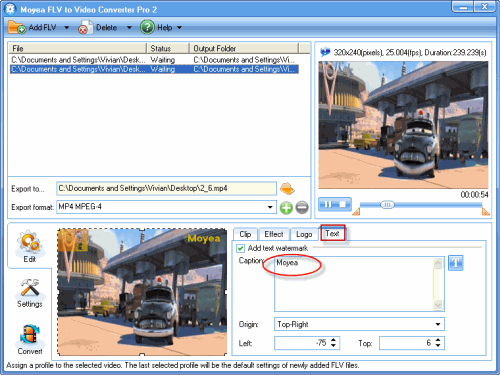
Add the text watermark in “Text” tag. Type the words that you want show on the video into “Caption” box. Then it will be shown. If you want to set the font, you can click “Text” button.
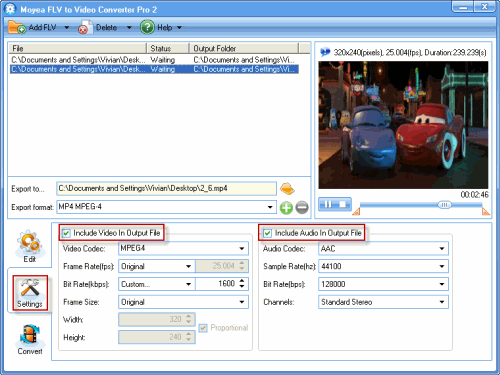
Step3. Configure video and audio settings
Click “Settings” and configure video and audio settings like bit rate, frame rate, video codec and so on.
Step4. Convert
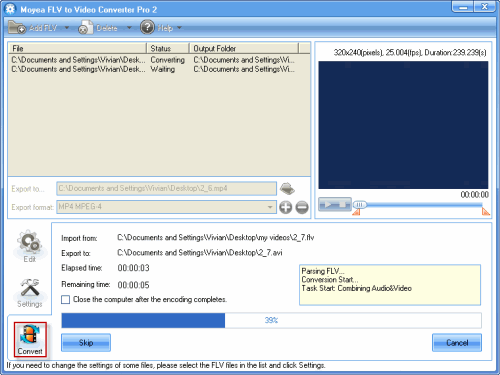
Click “Convert” and hit “Start” button to begin encoding. After the conversion, you can load it to your PS2 and make the game console a video entertainment center, or music player.
Tidak ada komentar:
Posting Komentar